You are viewing the article How To Make Garden Beds Without Too Much Fuss at Tnhelearning.edu.vn you can quickly access the necessary information in the table of contents of the article below.
If you don’t want to dig and you don’t want to pile, try this.
When I first started gardening, the “proper” way to prepare a garden bed was double digging. I wouldn’t recommend that for anything except really long-lived plants, like peonies and asparagus.
These days many people recommend lasagna gardening or something similar. I tried that, and it didn’t work too well for me. The biggest mistake I made was not making sure the bindweed was thoroughly dead before I laid down the cardboard and newspaper. I also didn’t pile up as much organic matter as I should have, due to not having enough around and not wanting to buy it. And thirdly, I didn’t want to wait for everything to rot and settle.
I Didn’t Want to Dig & I Didn’t Want to Pile
So I didn’t want to dig and I didn’t want to pile. Also I had read Jeff Lowenfel’s Teaming with Microbes and realized that the more you disturb the soil layers, the more you set back the microbes that are the real life force of soil fertility.
So I came up with a hybrid method, a compromise between ideal soil preparation and my limitations of time and money. (And space. Storing up enough newspaper to cover a new garden bed thickly requires storage space that other family members might prefer to put to other uses.)
The first thing I do is mark the bed with landscape paint, which was discussed in the previous post.
Remove the Sod
After that, I cut along the painted edge with a sharp spade. Then I find a teenage boy and hand him a mattock. I am not kidding you. I ask one of my strong sons to use a mattock and remove the sod. They learned from their father how to skim the sod off with shallow cuts, leaving as much soil behind as possible. The sod is used to fill bare or uneven spots in our lawn, used as fill, or thrown onto the compost pile.
Knowing that the most fertile soil is around the roots of the grass that was just removed, I used to pound the pieces of sod and shake out as much loose dirt as possible. And even after that, the soil level would still not be up to its previous level. I finally realized sod-pounding was not the best use of my time, so now I try to line up some organic matter to replace what was taken away–but not as much as you would need with the lasagna method.
Add Organic Matter
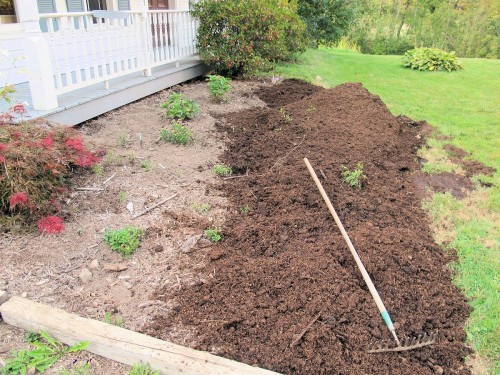
Since we’ve moved here, I’ve discovered a horse breeder a couple of miles away who sells well-rotted manure by the pickup truck load. He uses this little front-loader to toss and turn the pile frequently. I’m not sure if the pile generates enough heat to kill weed seeds, or the seeds sprout but then get killed by the disturbance, but I have had very little weeds come up from this soil amendment. Again with the help of family members, I shovel the well-rotted barn cleanings out of the back of the truck and onto the bed.

We just got done shoveling the manure out of the truck. Oops, it looks like I still need to remove some plants.
Don’t Dig It In!
Now here is where I depart from my previous practice. I used to dig all this good stuff into the native soil. I don’t do that anymore. I dig to the extent necessary to plant something, but I don’t uniformly dig through the whole bed. That’s my concession to what I learned from Mr. Lowenfels. The idea is to avoid disturbing the soil layers any more than you have to. And it is a heck of a lot less work and time.
Supposedly the earth worms will eventually incorporate the organic matter into the native soil. I haven’t seen that with my own two eyes. But the plants at the old house that were planted this way seemed to do fine. And really, it makes more sense to create a garden with plants that are adapted to the conditions you’ve got. If you have to heavily amend the soil and other conditions to make your plants happy, you’re making a lot of extra work for yourself. And it doesn’t stop with bed preparation. You’re going to have to keep babying them. Is the pleasure you get from those particular plants going to outweigh the extra effort, time, and expense? Only you can answer that question. Just don’t grow something because everyone else is growing it. End of rant.
Rake It & Make It Look Good
After I rake everything smooth, I’m ready to plant. This is the process I went through with all the beds I’ve created since I’ve moved here. Ideally, once they are planted, all the bare soil is covered with mulch. For the most part that hasn’t happened, but the weed problem hasn’t been too bad because that manure has been well-composted. I really think in order for a garden to thrive, more organic matter should be added every year, but I don’t manage it on every bed every year. That’s the goal I aim for, though.
This post is part of a continuing series chronicling how I am designing new gardens at my new (to me) house. All the posts are gathered under the category New House, New Gardens. Here is an overview and map of the environs.
Thank you for reading this post How To Make Garden Beds Without Too Much Fuss at Tnhelearning.edu.vn You can comment, see more related articles below and hope to help you with interesting information.
Related Search:

