You are viewing the article 12 ways to make Mid-Autumn lanterns for kids super simple and beautiful at Tnhelearning.edu.vn you can quickly access the necessary information in the table of contents of the article below.
The Mid-Autumn Festival is a special time of year when families gather to celebrate the harvest and enjoy the beauty of the full moon. One of the most beloved traditions during this festival is the making and displaying of lanterns. These beautiful lanterns not only add to the festive atmosphere but also hold cultural significance. If you’re looking for a fun and enjoyable activity to do with your kids, we have compiled 12 super simple and beautiful ways to make Mid-Autumn lanterns. From using paper and cardboard to more unique materials like mason jars and tin cans, these ideas will surely spark creativity and bring a sense of joy to your children. So, let’s delve into these creative ideas and make this Mid-Autumn festival a memorable one for your family!
Anyone who has been through the Mid-Autumn Festival can see the handmade lanterns are more meaningful than ever. Therefore, this is an opportunity for you to show off your ingenuity as well as express your love for your baby through this small gift. Hope the gift will bring you a meaningful Mid-Autumn Festival. Let’s start making lanterns now!
See more: 5 ways to make Mid-Autumn Festival toys with your baby that are easy and interesting to make
How to make a simple paper lantern
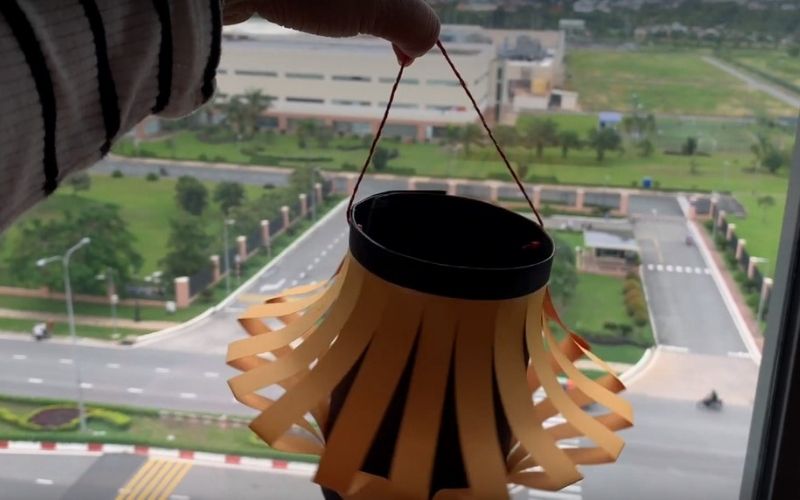 Simple paper lanterns
Ingredients to be prepared
-
9 sheets of medium-thick A4 color paper
-
1 scissors, 1 ruler, 1 pen
-
1 roll of rope for wrapping gifts
Doing
Step 1 First, you fold the paper in half vertically and horizontally to get the midpoint of each edge. Then, use a ruler to measure and connect the vertices together to form a diamond shape.
Step 2 From the first point position, you measure the distances of 2.3cm, 5.4cm, 8.3cm respectively and from those points draw a straight line up, turn the paper upside down and perform the same operations.
Step 3 Use scissors to cut out the diamond shape and the small segments, then fold the shape in half and connect them with the ends of the cut lines.
Step 4 Finally, put the round tube cut from the hard paper in the middle to fix the shape of the lantern.
Detailed reference: Instructions for making a simple paper Mid-Autumn lantern in 10 minutes.
How to make Angry Bird Mid-Autumn Festival lantern with bamboo
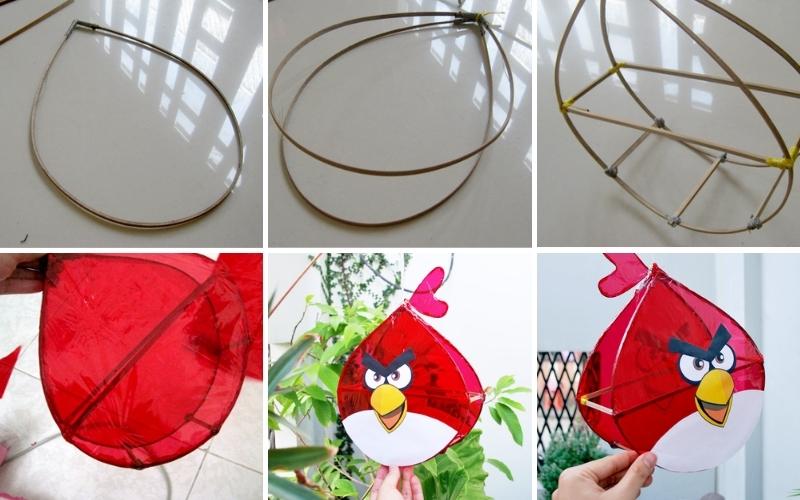 How to make Angry Bird Mid-Autumn Festival lantern with bamboo
Material:
-
A stick of bamboo
-
Pliers
-
Zinc wire
-
Red and white glass paper
-
Colored paper, marker
Doing:
Step 1 Soak bamboo in water until soft, split bamboo into long, thin rods, so that they can be bent into a circle.
Step 2 Create a bamboo rod into a circle, tie it with a wire, form 2 circles of the same size, stick the two ends together.
Step 3 Attach short bamboo slats between the two circles to create a lantern shape.
Step 4 Stick red glossy paper on the lantern, shape eyes and nose for Angry Birds and you’re done.
How to make lanterns with straws
Lanterns Straws are too complicated, not too expensive, and very meaningful for the Mid-Autumn Festival. The straw lantern is very cute and colorful. The method is not too picky, so you can create lanterns with your baby for the Mid-Autumn Festival.
You need the main materials are straws, plastic bottles, glue guns, scissors, … You need to cut the plastic bottle, cleverly arrange the straw to cover the outside of the plastic bottle cylinder to complete.
See more: Tell you how to make lanterns with super cheap and durable straws for children to play in the Mid-Autumn Festival
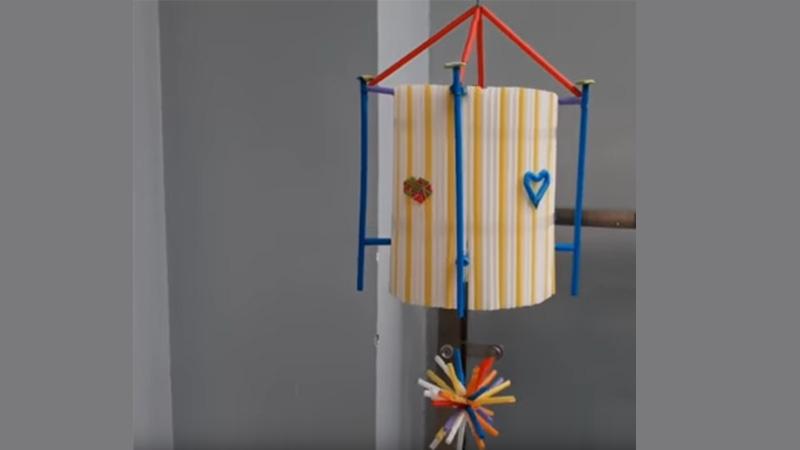 Lanterns Straws
How to make Mr. Star lantern
Ong Sao Lantern is one of the indispensable lanterns on the Mid-Autumn Festival. To make these lanterns, you need materials such as bamboo sticks, glue, glass paper, … What you need is to create a frame and glue the glass sheets to complete. In addition, you can decorate the outside to make the lantern more lively!
See more : How to make a simple traditional star lantern with 3 steps
 Mr. Star Lantern
How to make a Lantern Pulling Troops
If you are skillful or want to make your own lanterns, you only need a few simple tools to make an extremely beautiful lantern. The meaning of the pulling lantern is to help children recall history and love for their homeland through the images of soldiers in battle.
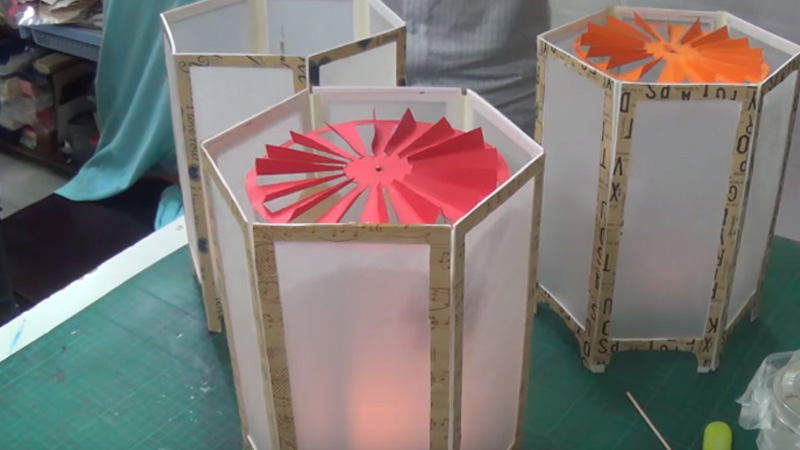 How to make a paper lantern
Ingredients to be prepared
-
Glue
-
Paper cutter
-
Drag
-
Ruler
-
Compass
-
About 6-7 A4 sheets of color or white cover
-
3-4 thick cardboard paperboards.
Doing
Step 1 Use the cardboard to cut the octagon as above, each side 9.5cm to make the roof of the lantern.
Step 2 Use another sheet of cardboard left as a candle holder, the same 9.5cm side. Use a compass to point a center in the middle, equidistant from each triangle to be removed is 1.5cm
Step 3 Using A4 white cardboard cut the width to 9.5 cm . Thus, each A4 sheet is 2 walls. You keep cutting until you have 8 walls, you can choose the color you want. Then, you cut the middle part of the wall just separated.
Step 4 Take a white sheet of paper to measure the size to fit the window you have cut before, then glue it back to the wall with a white window.
Step 5 For each wall you just made, fold each end and end about 1cm
Step 6 Glue the walls back. Then take the other end of the wall, stick it on the cardboard to hold the candle. And fix the walls together inside the lantern
Step 7 As a wind propeller, this propeller has the effect of rotating the animal shapes inside the lamp to cast shadows on the light walls. Fixing the propeller and shaping the propeller
Step 8 Attach the shaft to the blower
Step 9 Fan decoration
Step 10 Fixed axis of rotation
See more: How to make Mid-Autumn lanterns pull troops out of paper for the Mid-Autumn Festival
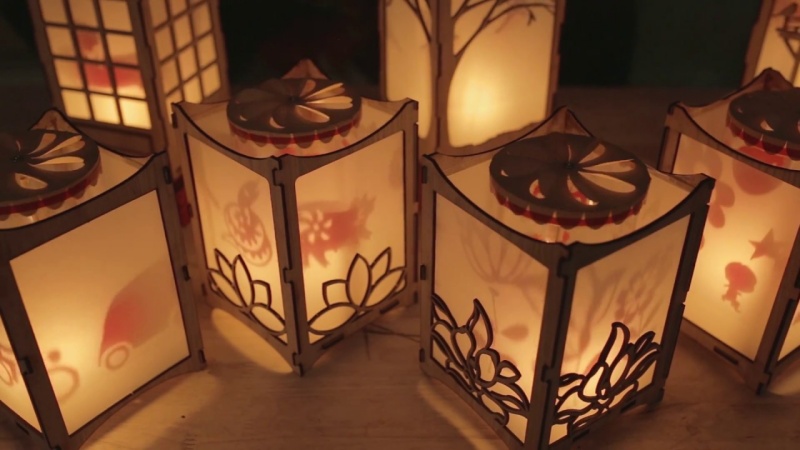 Lantern Pulling Troops
How to make a Carp lantern
Next is a lantern that is very familiar to anyone – the Carp lantern. Carp lanterns are a symbol of strength to overcome difficulties and show courage. To make this lantern is not too complicated. You need the main materials are colored paperboard, paper core, scissors, glue, … Just take a little time to complete the Carp lantern for your baby to play in the Mid-Autumn Festival!
See more: How to make a simple paper carp lantern for kids
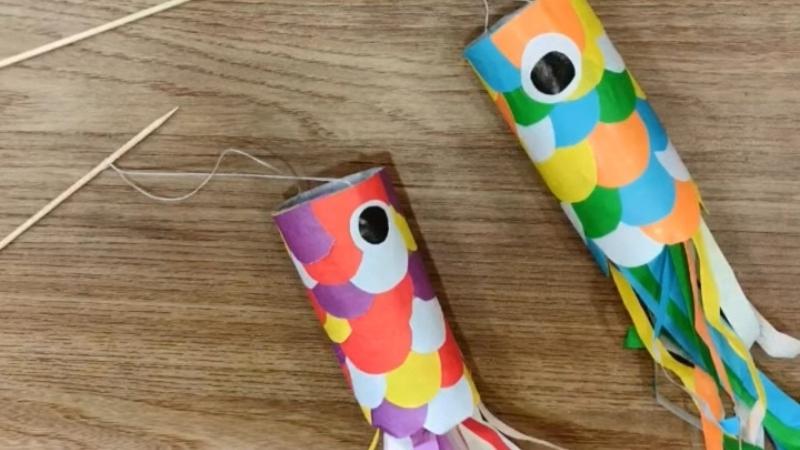 Carp Lanterns
How to make a glass lantern
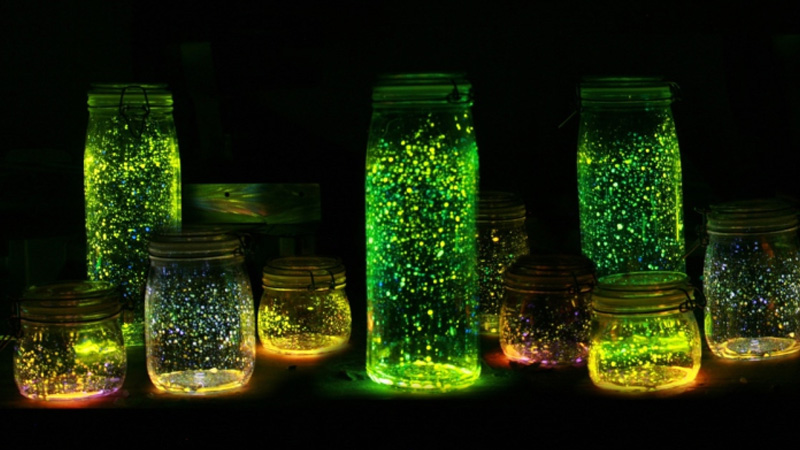 Glass lanterns
Ingredients to be prepared
-
Glass jars
-
Luminous paint powder (you can choose to buy your own luminous color as you like at art or craft stores)
-
Brush, water
Doing
Step 1Wash the glass jar as a lantern and let it dry.
With luminous color, you add water to the color little by little , constantly stirring to make the color medium, with high stickiness.
Step 2Use a paintbrush and dip each dot into the jar.
Step 3Dry in the sun or use a yellow bulb to dry the color completely
How to make a round lantern
Round lanterns are lanterns that not only appear during the Mid-Autumn Festival but are also often used for decoration. This is the symbol of the moon on the full moon day, both round and bright. This is a celebration of the beauty of nature and a wish to thank heaven and earth for a bountiful harvest.
Use very simple materials such as colored paper, cardboard, needles, glue. You just need to skillfully cut, paste and fold the paper together, fix it with a thread, and immediately have a round lantern to play Mid-Autumn Festival!
See more: How to make beautiful and simple paper Mid-Autumn lanterns for kids
 Round Lantern
How to make lanterns from milk cans
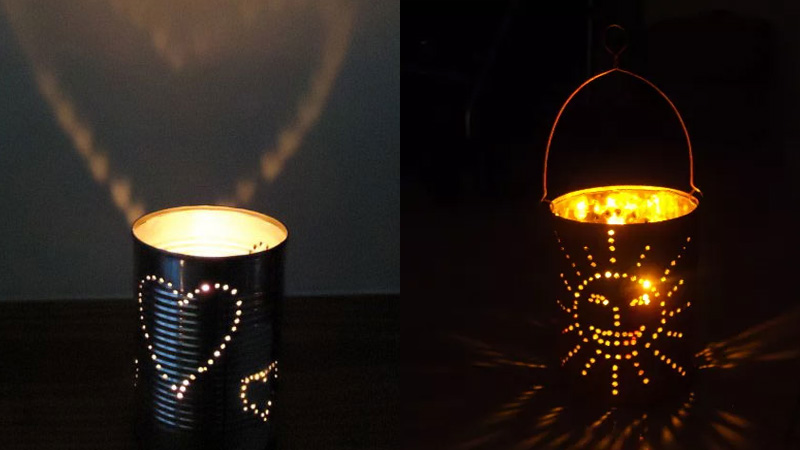 How to make a simple milk can lantern
Ingredients to be prepared
-
2 – 4 tin cans
-
Nails (you can use as many sizes as you want)
-
Paper, pencil, tape, scissors
-
Hammer
-
Candle
-
Towel
Doing
Step 1 New canned goods you clean the label , then fill with water and place in the freezer overnight. This prevents the box from distorting when punching holes.
Step 2 Freely punch holes as you like on the paper
Step 3 You fold a towel and put the box on top of the towel and then nail it to the marked points, use a hammer to lightly tap 3-4 times to make a round hole in the body of the box.
Step 4 After you have completed the pattern, you wash the tin under running water, remove the ice inside, and dry the box.
Step 5Put the candle in the middle of the bottom of the box and light the candle when using
See more: How to make a lantern out of milk cans
How to make lanterns from plastic bottles
Instead of discarding plastic bottles, why not shake hands and transform them into beautiful and eye-catching Mid-Autumn lanterns. With plastic bottles, you can make different shapes of lanterns such as pig, oval, ghost,… With the main ingredients being plastic bottles, scissors, glue and a simple way to do it, what are you waiting for without blooming? talent do it now!
See more: 5 simple ways to make lanterns with beautiful plastic bottles for babies
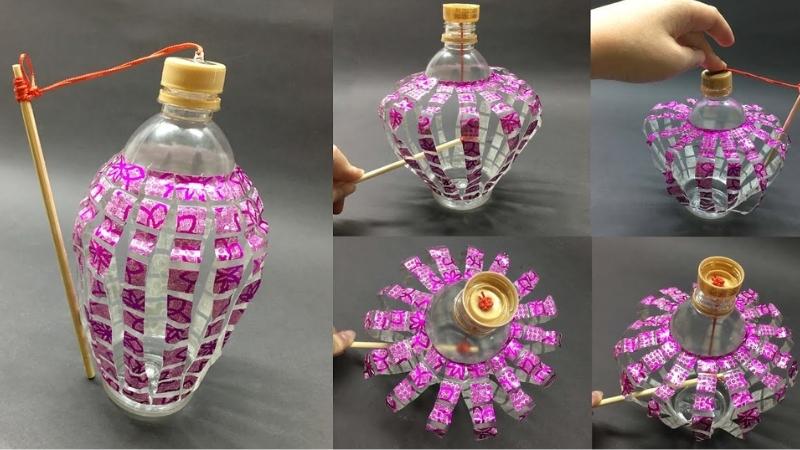 Lanterns Plastic bottles
How to make a left-hand lantern
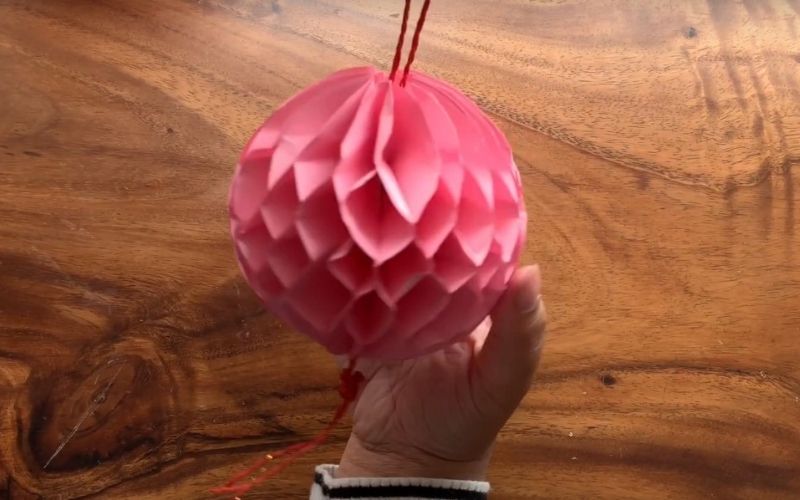 Lantern left Asia
Ingredients to be prepared
-
4 sheets of thin A4 color paper (you can choose your favorite color)
-
1 bottle of milk glue
-
1 compass
-
1 scissors
-
1 ruler
-
Rope for wrapping gifts
Doing
Step 1 You use a compass to measure and cut into circles with a radius of 5cm . Next, you cut those circles out and fold them in half together.
Step 2 After folding, you pour milk glue into the 2 lines next to the middle fold line and then glue the 2 sides , wait until the glue dries, then paste the same with the remaining pieces of paper.
Step 3 Finally, you cut a medium length of rope , fold it in half and tie a knot to form a lantern handle.
See more: How to make a super-simple fruit-shaped Mid-Autumn lantern
Fire lanterns
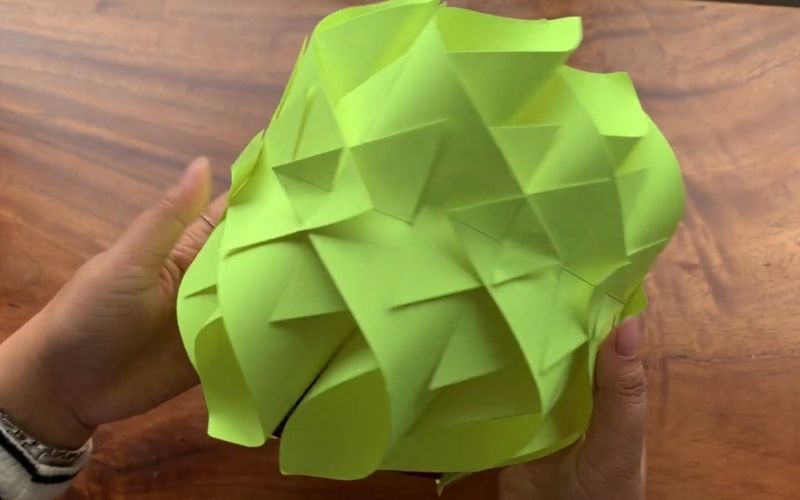 How to make Mid-Autumn Festival lanterns with fire-shaped paper
Ingredients to be prepared
-
2 sheets of hard A4 paper with different colors (you can choose the color you like)
-
1 scissors
-
1 roll of double-sided tape
-
1 ruler, 1 pen
-
1 piece of gift wrapping rope
Doing
Step 1 First, you use a ruler to measure the width of an A4 sheet of paper about 5cm . With the remaining paper, you also due to its width is 1cm and then use scissors to cut these 2 parts .
Step 2 Next, you fold the paper in half , cut it into small pieces, so be careful not to cut it too big or too small because it can make the lantern bad.
Step 3 Open the inner side and apply double-sided tape to the long side . When the glue sticks, peel off the outer paper and then paste it over the remaining A4 paper.
Step 4 For the section of paper that is cut out, use a ruler to measure the width of about 1cm , then cut it into small, long strands with scissors. Use double-sided glue to glue that part of the paper at the top of the lantern to create a border. Finally, you cut the rope into a moderate length and then thread it through to make a lantern handle.
See details: How to make Mid-Autumn lanterns with fire-shaped paper super easy for children.
Lantern 7 colors
Ingredients to be prepared
-
4-5 sheets of colored paperboard (color of your choice)
-
Compass
-
Glue
-
Drag
-
Ruler
Doing
Step 1 Cut about 16 colorful circles about 8cm in diameter, then fold them in half.
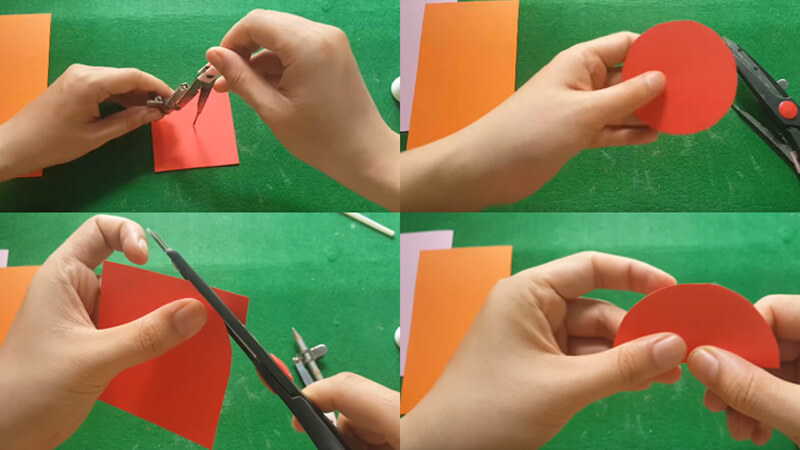 Cut out about 16 colorful circles
Step 2 Cut another rectangle with length 17.5 x 10cm . You draw small lines 1cm apart in the small rectangle.
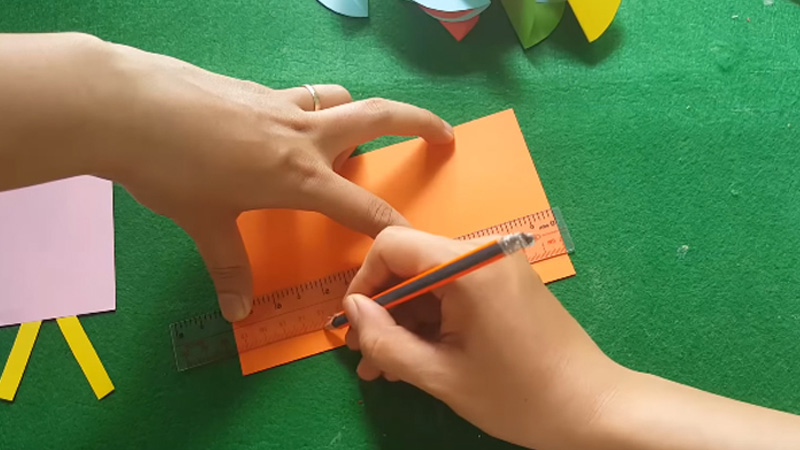 Cut another rectangle with length 17.5 x 10cm
Step 3Glue the edges of the folded small circle to the places you have outlined , remember to glue in the middle (ie the top and bottom ends still have room to make the top and bottom).
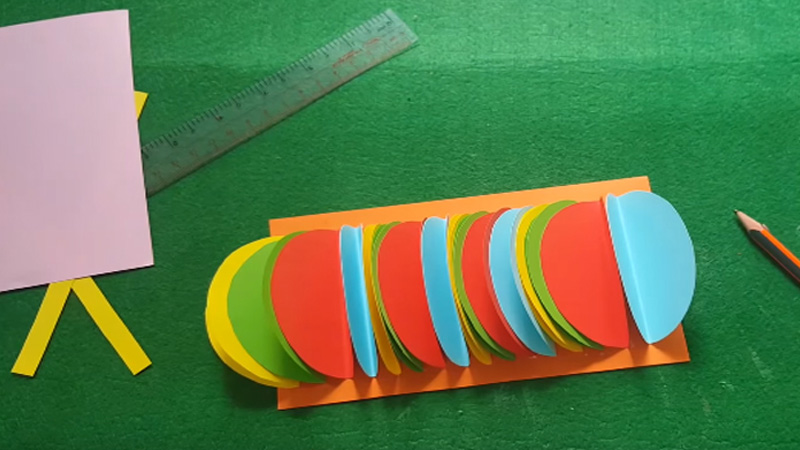 Glue the edges of the folded little circle to the places you’ve outlined
Step 4 Using a different color paper , also cut a 16x8cm rectangle . Cut into fringes like this, leaving about 1cm on top of uncut ends.
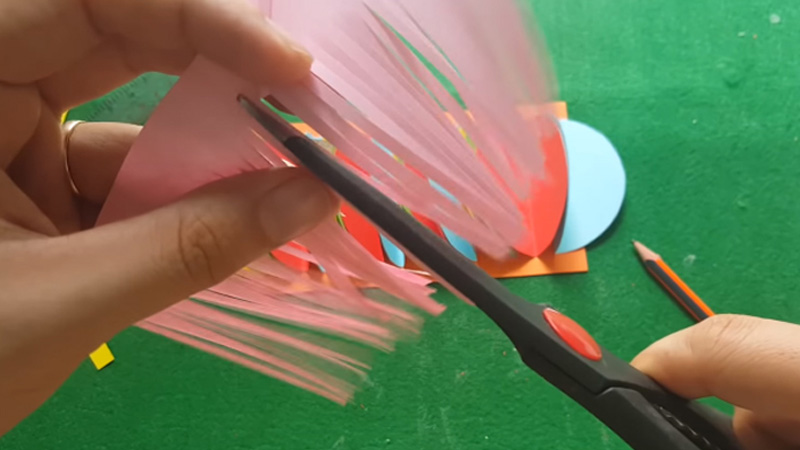 Cut tassels
Step 5 Next, you glue the two sides of the rectangle with the width of the circles pasted, take the tassel you just cut and paste it on the bottom of the lantern.
 Paste the lantern
Step 6 Cut two more 16x1cm strings , stick them to the top and bottom for the lantern. Finally, you cut another 12x1cm long string to make a handle for the lantern.
 Make a lantern handle
Finished product
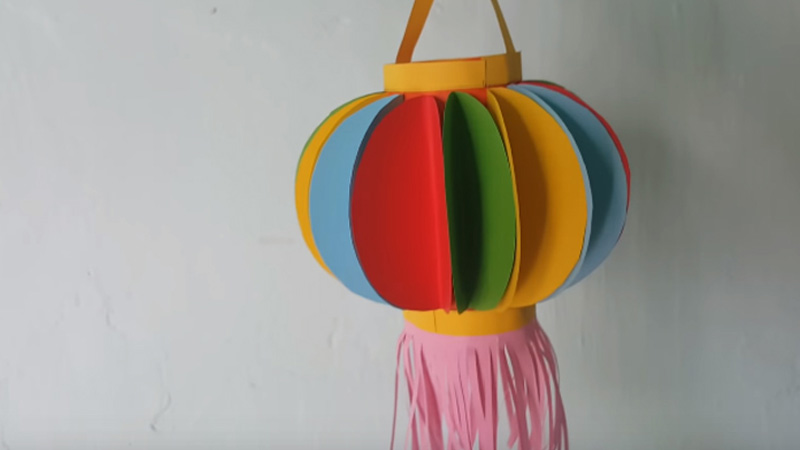 Finished Lanterns
See more: What does the Mid-Autumn Festival tray include? How to display the tray to be beautiful?
That’s it, there are lovely and colorful lanterns for our children to enjoy this Mid-Autumn Festival!
See also: 11 traditional Vietnamese Mid-Autumn Festival toys
Tnhelearning.edu.vn
In conclusion, making Mid-Autumn lanterns for kids can be a delightful and rewarding experience. By following the twelve simple and creative ways outlined in this guide, parents and educators can effortlessly create stunning lanterns that capture the essence of this traditional festival. From utilizing everyday materials such as paper cups, tissue paper, and LED lights, to more intricate techniques like painting and decoupage, there is a lantern-making idea suitable for all skill levels. Not only does this activity encourage children to embrace their creativity and explore their artistic abilities, but it also allows them to connect with the rich cultural heritage of the Mid-Autumn Festival. By implementing these ideas, children can enjoy the process of making lanterns and be proud to display their beautiful creations during this joyful celebration.
Thank you for reading this post 12 ways to make Mid-Autumn lanterns for kids super simple and beautiful at Tnhelearning.edu.vn You can comment, see more related articles below and hope to help you with interesting information.
Related Search:
1. DIY easy Mid-Autumn lanterns for kids
2. Simple step-by-step guide to making Mid-Autumn lanterns for children
3. Kid-friendly Mid-Autumn lantern crafts made simple
4. How to create beautiful lanterns for kids during Mid-Autumn festival
5. Easiest ways to make stunning Mid-Autumn lanterns for children
6. Quick and fun ideas for making kid-friendly Mid-Autumn lanterns
7. Beautiful lanterns made easy: 12 ideas for kids during Mid-Autumn festival
8. Simple and creative crafts: 12 ways to make Mid-Autumn lanterns with kids
9. Kid-approved designs for Mid-Autumn lanterns: 12 easy ideas
10. Inspiring and easy-to-follow tutorials for making Mid-Autumn lanterns with kids

